RMarkdown is just super-great. To start, it’s plain text, so in a pinch you can read or edit it with basically anything. Next, its formatting is, at least for the most part, easy to remember and easy to interpret. And because it’s RMarkdown, it lets you mix text and R code so that all of your work is in the same document, making it easy for others (and your future self) to see exactly what you did and, if desired, reproduce your work. Finally, it’s incredibly versatile, so you can use it for all your writing.

Here, I’m going to talk about how to get yourself set up to write three important kinds of academic documents in RMarkdown: articles (and the like, including seminar papers), syllabi, and CVs.
Since all of these are documents we will want as PDFs (as opposed to web pages), you’ll need to install \(\LaTeX\) on your computer. The easiest way to do this is by using the tinytex package:
install.packages("tinytex")
tinytex::install_tinytex()
If you have a Mac, you will also need to install XQuartz before continuing.
Okay, let’s get started!
Articles
Start any research project you have with a fresh new project repo–create it on GitHub and open it in RStudio (you remember how to do that, right?).1 Then go to the Files tab in the lower right pane of RStudio, click on New Folder button, and call the new folder “paper” (we’ll worry about other directories that you might need in a project repo another time).
In this directory, we’re going to put three separate files to produce the pretty PDF output we want: the RMarkdown file, which is where you write up your research; a Bib\(\TeX\) file, which contains bibliographic information about the sources you cite; and a template file, which specifies how the final output should look. There’s an example repo here. I’m going to discuss the three files in reverse order, from the one that requires the least attention from you to the one that needs the most.
The Template
There are many article templates out there; there’s even an R package called rticles that makes starting a new draft extra easy. The journals that package’s templates are modelled on lean toward the physical sciences, though, so instead we’re going to work with a template originally written by our fellow political scientist Steven V. Miller and slightly modified by me.2 Anyway, the file is called svm-latex-ms2.tex; put a copy of it in your paper directory each time you start an article project. If you find a different template you’d like to use, just put that in there instead. And that’s that.
The Bib\(\TeX\) File
If we want RMarkdown to automatically generate our bibliography (and we darn sure do), we need to provide information on all of the sources we’re citing. That’s what the Bib\(\TeX\), or .bib, file is for. Whenever you come across an article that you know you’re going to need later, or think you might need later, or just find interesting, you add it to your personal Bib\(\TeX\) file. So how exactly do you do that?
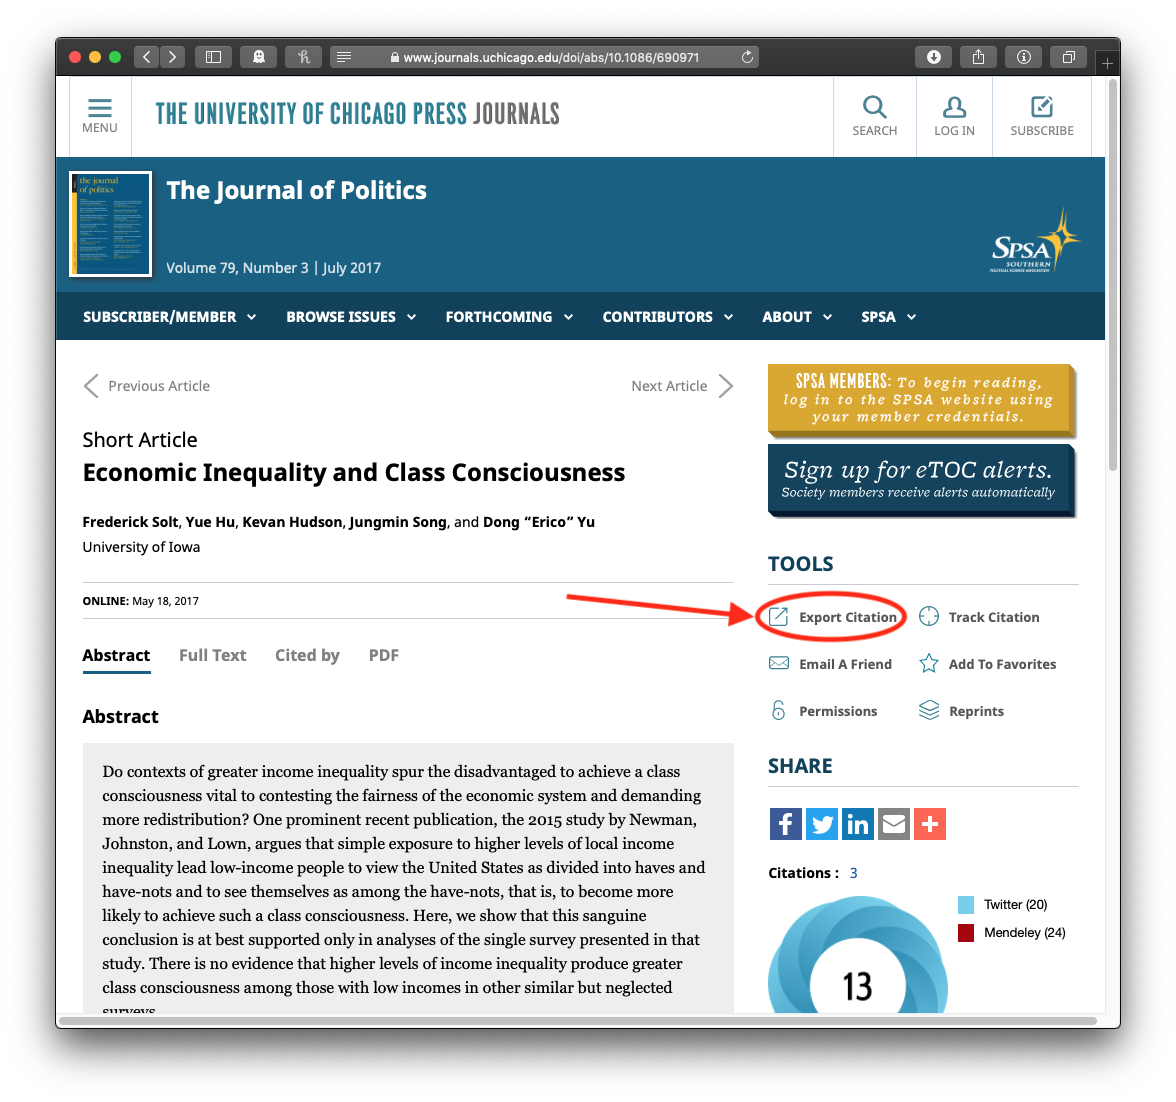
Unless you’re a dedicated Zotero user, your first step will be to get some Bib\(\TeX\) reference manager software.3 If you’re a Mac user like me, give BibDesk a try; I’ve been using it for many, many years. If not, JabRef is the standard. Then, as you’re doing your reading, keep your personal Bib\(\TeX\) file open in that reference manager. You’ll see that pretty much all journals have a button labelled “export citation” or some such. Hit the button, choose BibTeX format, and click through. Depending on the journal publisher, this may download a small .bib file or pop open a new window. If the former, drag the downloaded file your personal Bib\(\TeX\) file in your reference manager to add the new source; if the latter, copy the text, click on your personal Bib\(\TeX\) file, and then paste. This should add the new source. Then—and this is important for friction-free writing later—take a minute and double-check all the entries in the reference manager. Some journals’ citation exports only include first initials, not the whole first name. Make sure the cite key (more on cite keys below) matches whatever convention you choose to adopt. And so on. If you’re careful right when you add a source, you’ll never have to worry about any errors in your bibliographies ever again.
Keep all your sources in your personal Bib\(\TeX\) file: it’ll get long, but since it’s just plain text, never really big. Make sure it gets backed up!4 But each project repo should have its own Bib\(\TeX\) file as well. That way, your project repo is self-contained—it doesn’t rely on files that are located elsewhere on your computer. Just make a new Bib\(\TeX\) file for each project, keep it in the paper directory, and drag sources to it from your personal Bib\(\TeX\) file as you cite them. Just be sure that you only add new sources to your personal Bib\(\TeX\) file and not directly to any project’s file, so that you always know all the sources you’ve entered are in one place and you never end up duplicating that work.
The RMarkdown File
The RMarkdown file is where you’re going to put nearly all of your attention as you’re writing: it contains all of your text and R code. The trick to using RMarkdown to write a beautifully formatted article is in the front matter, which is called the YAML header. (YAML stands for Yet Another Markup Language. Those kidders.) Anyway, let’s look at the header in the example_article.Rmd file:
---
output:
  pdf_document:
    citation_package: natbib
    keep_tex: false
    fig_caption: true
    latex_engine: pdflatex
    template: svm-latex-ms2.tex
title: "An Example Article"
thanks: "The paper's revision history and the materials needed to reproduce its analyses can be found [on Github here](http://github.com/fsolt/example_article). Corresponding author: [frederick-solt@uiowa.edu](mailto:frederick-solt@uiowa.edu). Current version:  `r format(Sys.time(), '%B %d, %Y')` ."
author:
- name: Frederick Solt
  affiliation: University of Iowa
abstract: "Here's where you write 100 to 250 words, depending on the journal, that describe your objective, methods, results, and conclusion."
keywords: "these, always seem silly, to me, given google, but regardless"
date: " `r format(Sys.time(), '%B %d, %Y')` "
fontsize: 11pt
spacing: single
bibliography: \dummy{ `r file.path(getwd(), list.files(getwd(), "bib$"))` }
biblio-style: apsr
citecolor: black
linkcolor: black
endnote: no
---
The stuff you’ll want to change here is pretty obvious, I think. For now at least, definitely leave everything under output: alone; there’s no need to change anything with R code either, except maybe if you would want to freeze the date for some reason. For more detail on each entry in the YAML header, see Steven V. Miller’s post on his template.
The example file also includes examples of pretty much everything you’re likely to want to do in an article manuscript: headings, footnotes, embedded R code (and how to hide it), plots with captions and how to refer to them, block quotes, comments (that is, notes to self), and, of course, citations.
Addendum: One more thing we need to get our bibliographies formatted in APSR style is (drumroll) the APSR bibliography style file. Download it from here (right-click to get a contextual menu, then select “Download Linked File” or “Save Target As…” or whatever similar option your browser gives you). Now we have to (1) put this file somewhere safe, and (2) let R know where it is. For (1), on a Mac, go to the Finder, then use the Go menu, select Go to Folder…, and enter Users/your_own_username/Library/ (this folder is hidden by default). Make a folder called texmf there, make one. On Windows, make a texmf folder within your user at C:\Users\your_own_username. Inside the texmf folder, make a bibtex folder. Inside that, make a bst folder.5 Drop the apsr.bst file there. Okay, on to (2). First, install the usethis package: install.packages("usethis"). Then past this usethis::edit_r_environ() into the console to open the .Renviron file, which is ordinarily hidden. Add the following line to that file but make sure to replace the example (Mac) path below with the path to the bst folder you just made, save, and restart R from RStudio’s Session menu.
BSTINPUTS="/Users/your_own_username/Library/texmf/bibtex/bst"Troubleshooting: \(\LaTeX\), unfortunately, doesn’t play nice with filepaths with spaces in them—that is, if there are any spaces in the names of any of the folders your .Rmd file is nested in, and it looks for a separate .bib file (at least the way I have coded it up in this template), RStudio’s knit button won’t be able to make you a pretty PDF. Correct this as you see fit. Personally, my filepaths tend to look like this: Users/fsolt/Projects/whatever_title/paper/whatever_title.Rmd.
All right, now we’re ready to rock this.
Syllabi
To write a syllabus in RMarkdown, you’ll need to start with a good template. Fortunately, Steven V. Miller has made one for this purpose too: svm-latex-syllabus.tex. And, of course, you’ll need an RMarkdown file with the appropriate YAML header. Steve describes the details in his blog post on the template, so I’ll skip that here. He also writes in that post about how to automatically generate the dates you need for your course schedule, but nowadays there’s an easier way of doing that I want to show you. Put this chunk near the top of your document:
```{r include = FALSE}
library(tidyverse)
library(lubridate)

firstday <- "2019-01-15"

meetings <- ymd(firstday) + c(0:15) * weeks(1)

meeting_headers <- paste0("Week ", 1:16, ", ", months(meetings), " ", day(meetings))

```
Then you can make headers for each week with
## `r meeting_headers[1]` : Something Interestingwhich will display as
Week 1, January 15: Something Interesting
Neat, huh? The next time you teach, instead of fussing with all the dates, you just have to change firstday in the chunk above to the first day your class meets in the new semester, and that’s it. More time to update the readings!
Speaking of readings, sadly, I don’t think there’s a good Bib\(\TeX\) integration option for RMarkdown syllabi yet. Being extremely picky, I want something that formats full mid-document bibliographic citations, in complete APSR format, with links to the reading online. I suppose I should dig more on this, but in the meantime I’m just typing them in 😢. You’ll find an example repo here and the RMarkdown syllabus for this very course is here.
CV
Finally, let’s do your CV, too. Our RMarkdown template hero, Steven V. Miller, has us covered there as well. The template is here and his post describing how to put it to use is here. And for once, at least, I don’t have much to add.
So there you go: articles, syllabi, and CVs are easy and beautiful in RMarkdown. Now you can write up not just your research reproducibly, but your teaching and professional documents as well.
There’s really no reason not to have a separate project repo for every project: you have unlimited free repos on GitHub, and the marginal space used on your drive is truly tiny. The main advantage is that having a project repo for each project keeps your work organized. I keep all of my project repos together in a directory called “projects” in my Documents folder.↩︎
There are a couple of little changes that are in there just because I’m hopelessly fussy, but one important one that allows us to easily keep our Bib\(\TeX\) file right in the project repo. To Steve, in addition to my thanks for your great work on this, I owe you a PR. To everyone else, just like everything else having to do with templates, you don’t have to worry about it.↩︎
A Bib\(\TeX\) file is just more plain text, so you can write or edit it in just about anything, but dedicated software makes it much nicer to work with.↩︎
If you don’t have another backup solution already in place for your work, start a GitHub repo for it! This isn’t ideal, really, because it requires you to take an extra, conscious step going of opening that repo in RStudio and backing it up. Unlike your other work, you’re not already in the relevant RStudio project to edit the file, so you don’t get the visual prompt in RStudio’s git pane (in the upper right) that the file has been modified and needs to be committed and pushed. So some other backup solution (Time Machine, Resilio Sync, a cloud backup provider, or something else that’s automatic) is really, really preferable.↩︎
There’s a chance that you’ll find at least some of these folders in these locations already. If so, just use the ones you’ve got; don’t make more.↩︎